


Quick-Start: The Fastest Way to Safe, Clear Water
You don’t need to read this entire guide before getting started. If you’re standing poolside right now with murky water and a confused expression, here’s your same-day action plan to get your pool water back on track.
Before you begin, make sure you have:
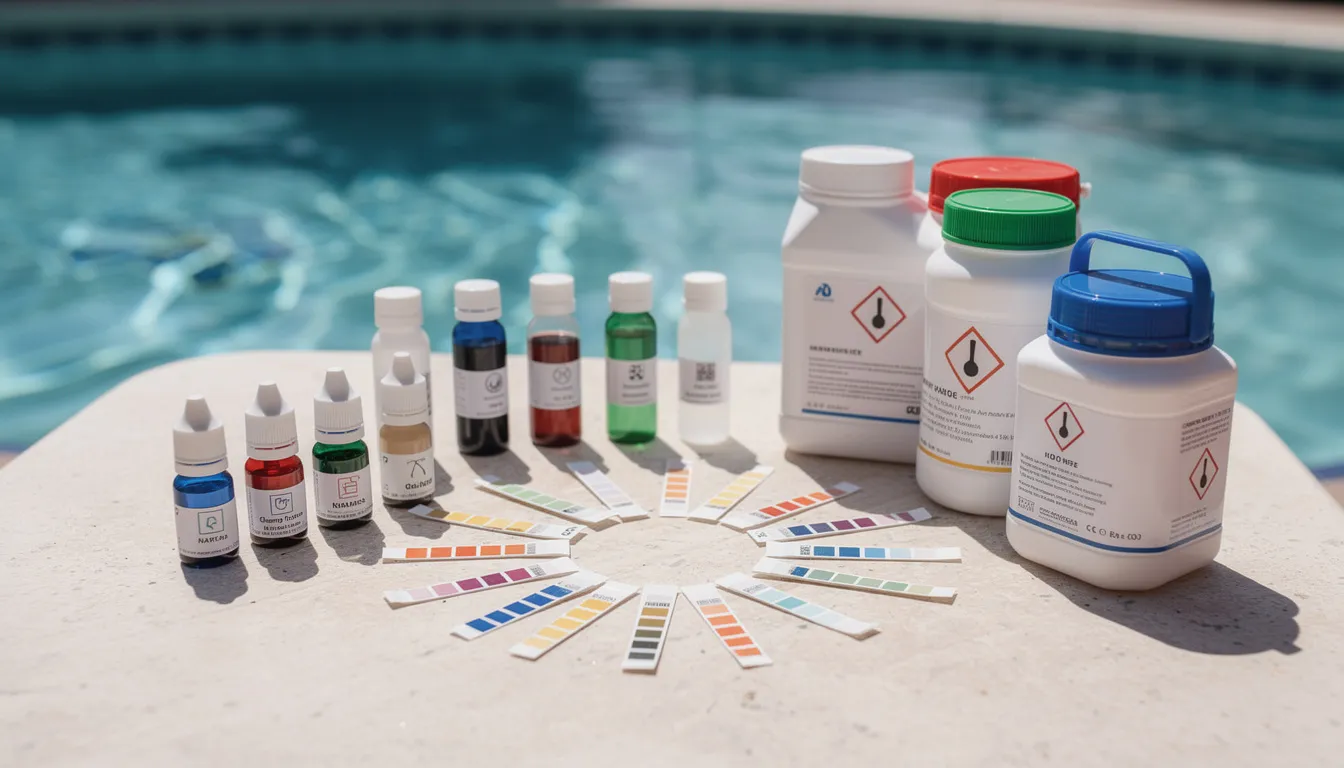
A reliable test kit or test strips
Pump running and circulation system operating
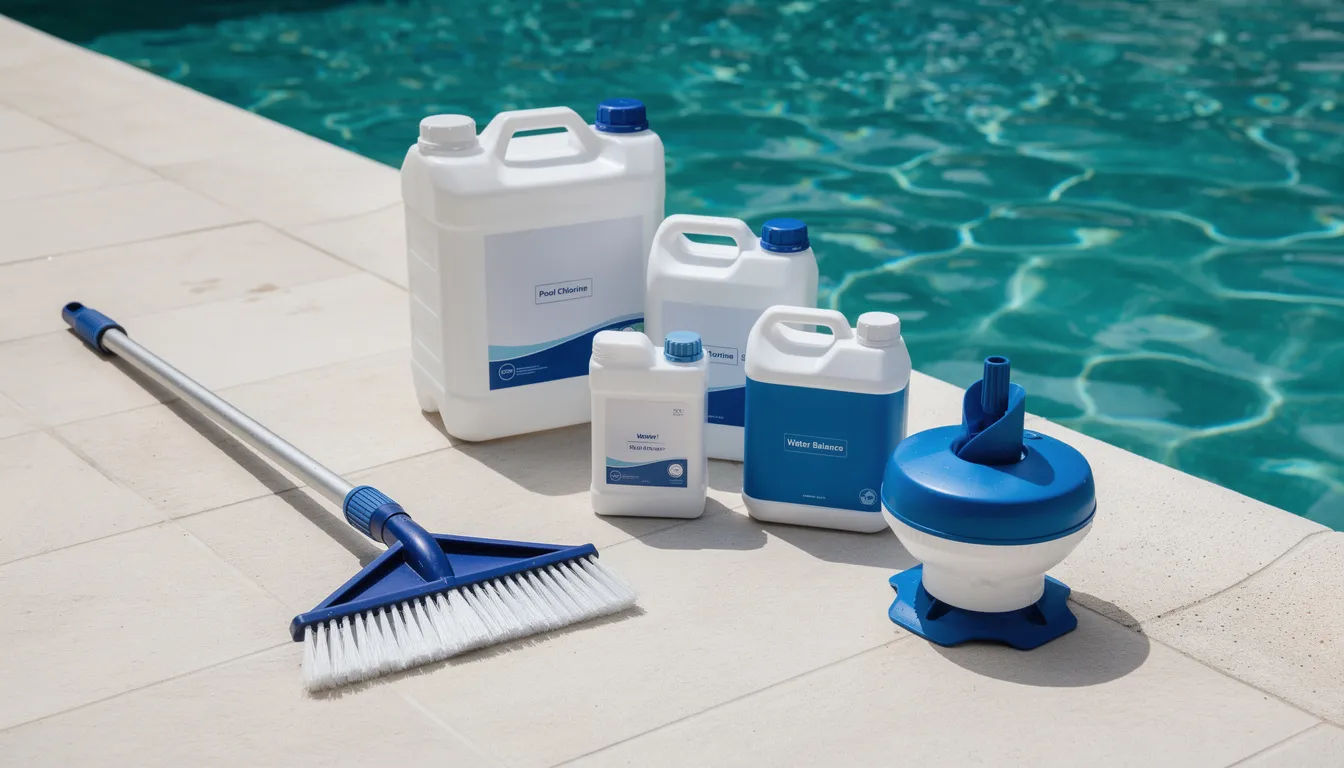
Basic chemicals on hand: chlorine (liquid or granular), pH increaser (soda ash), pH decreaser (muriatic acid or dry acid), alkalinity increaser (sodium bicarbonate), and stabilizer (cyanuric acid)
Your same-day action plan:
Test your pool water for pH, total alkalinity, and free chlorine
Correct total alkalinity first if it’s outside 80-120 ppm
Adjust pH to 7.4-7.6 range
Add sanitizer to bring free chlorine to 2-3 ppm
Run your pump continuously for 24 hours
Retest the next day and fine-tune as needed
That’s it. This simple sequence—test, balance alkalinity, balance pH, set sanitizer—is the foundation of maintaining proper pool chemistry. Master this routine, and you’ll handle 90% of what pool ownership throws at you.
Why Pool Water Chemistry Matters
Balanced pool chemistry does three essential jobs simultaneously: it protects swimmers from harmful bacteria and irritation, preserves your pool surfaces and equipment from damage, and keeps water looking inviting enough that you actually want to jump in.
What happens when chemistry goes wrong:
Swimmer discomfort: Red, stinging eyes and itchy skin that makes everyone blame “too much chlorine” (when it’s usually the opposite—chloramines from insufficient sanitizer)
Cloudy or green water: That murky appearance signals algae growth, poor filtration, or chemical imbalance
Equipment damage: Corroded heaters, pitted pump impellers, and degraded seals that lead to expensive repairs
Surface deterioration: Etched plaster, stained vinyl liners, rough fiberglass, and scale buildup on tile
Salt cell failure: Calcium deposits that reduce efficiency and shorten the lifespan of your salt chlorine generator
Many pool owners have experienced these scenarios firsthand. Opening the pool in May to discover green swamp water after months under a winter cover. Watching a mid-July algae bloom appear 48 hours after a packed pool party. Finding mysterious stains after adding well water to top off evaporation losses.
The financial impact adds up quickly. Unbalanced water accelerates wear on pumps, heaters, filters, and surface finishes—equipment that can cost thousands to replace. Industry estimates suggest that proper water chemistry can cut equipment repair costs by 50% or more over the life of your pool.
Understanding the Core Pool Chemistry Parameters
Think of pool chemistry as a team sport where five players work together: pH, total alkalinity, free chlorine, cyanuric acid, and calcium hardness. When one falls out of balance, it affects all the others.
Here’s a quick reference for ideal ranges in a typical backyard pool:
| Parameter | Ideal Range | What It Does |
|---|---|---|
| pH | 7.4–7.6 | Controls sanitizer effectiveness and swimmer comfort |
| Total Alkalinity | 80–120 ppm | Buffers pH against rapid swings |
| Free Chlorine | 2–3 ppm | Kills bacteria, viruses, and algae |
| Cyanuric Acid (CYA) | 30–50 ppm | Protects chlorine from UV degradation |
| Calcium Hardness | 200–400 ppm | Prevents surface etching or scaling |
The goal isn’t perfection—it’s staying within these ranges consistently. Your pool won’t suffer if pH drifts to 7.5 instead of hitting exactly 7.4. Focus on maintaining balance rather than chasing specific numbers.
pH: The Master Control Dial
The pH scale runs from 0 (extremely acidic) to 14 (extremely basic), with 7 being neutral. For pool water, you’re targeting a slightly basic range of 7.4–7.6, which happens to be close to the pH of human tears—hence less eye and skin irritation for swimmers.
Here’s why pH matters so much: it directly controls how effective your chlorine is. At pH 7.4, roughly 50-70% of your chlorine exists as hypochlorous acid (HOCl), the powerful sanitizing form that actually kills bacteria. Push pH above 7.8, and that percentage drops dramatically—your chlorine becomes up to 90% less effective even though your test kit shows adequate levels.
Signs of pH problems:
| Low pH (below 7.2) | High pH (above 7.8) |
|---|---|
| Eye and skin irritation | Cloudy water |
| Equipment corrosion | Scale formation |
| Etched plaster surfaces | Chlorine loses effectiveness |
| Metal fixture damage | Dull, lifeless water appearance |
To raise pH, use soda ash (sodium carbonate) dissolved in a bucket of pool water, then pour slowly in front of a return jet. To lower pH, carefully add muriatic acid or dry acid (sodium bisulfate), always diluted and poured away from pool walls and metal fixtures. Keep swimmers out during adjustments.
Total Alkalinity: The pH Stabilizer
If pH is the dial you’re trying to set, total alkalinity is the shock absorber that keeps it from bouncing around every time it rains, someone adds chemicals, or a dozen kids cannonball into the pool for three hours.
Total alkalinity measures the concentration of bicarbonate and carbonate ions in your water, expressed in parts per million (ppm). For most inground pools, target 80–120 ppm, with many plaster pools running happiest around 90–110 ppm.
Low alkalinity (below 80 ppm): Your pH will swing wildly with every addition—rain raises it, chlorine lowers it, and you’ll be constantly chasing corrections. Water becomes corrosive and aggressive toward surfaces and equipment.
High alkalinity (above 120–140 ppm): pH becomes stubbornly high and difficult to adjust. Cloudy water and scaling become more likely.
To raise alkalinity, add sodium bicarbonate (essentially baking soda in commercial form) in doses spread around the pool with the pump running. To lower it, add acid gradually and consider aeration (running water features or pointing returns upward) to help release excess carbonates. Make changes slowly over 24–48 hours rather than all at once.
Calcium Hardness: Protecting Surfaces and Equipment
Calcium hardness measures the dissolved calcium in your pool water—a critical factor for protecting plaster, concrete, tile, and pool equipment from damage.
Target ranges by pool type:
| Pool Surface | Ideal Calcium Hardness |
|---|---|
| Plaster/Concrete | 200–275 ppm |
| Vinyl Liner | 175–250 ppm |
| Fiberglass Pools | 175–225 ppm |
Low calcium hardness (below 150–200 ppm): Soft water becomes aggressive, actively seeking minerals from whatever it contacts. This means etched plaster, rough surfaces, pitted metal fixtures, and damaged heater elements. The water literally dissolves your pool.
High calcium hardness (above 400–500 ppm): Excess calcium precipitates out as white, crusty scale on tile lines, inside heaters, and coating salt cell plates. Scale reduces efficiency and shortens equipment lifespan.
Raise calcium hardness level with calcium chloride, added slowly to a bucket of water (never add water to calcium chloride—it generates significant heat). Broadcast the solution around the deep end with the pump running. If hardness is too high, the only practical fix is a partial drain and refill with lower-hardness source water.
Cyanuric Acid (CYA): The Chlorine Shield
Think of cyanuric acid as sunscreen for your chlorine. Without it, the sun’s ultraviolet rays destroy free chlorine in a matter of hours on a bright summer day. With proper CYA levels, that same chlorine remains active for days.
For most outdoor pools, maintain CYA between 30–50 ppm. Saltwater pools often run comfortably at 50–70 ppm because salt chlorine generators produce a steady supply of fresh chlorine.
Low CYA (below 30 ppm): Chlorine disappears rapidly in sunlight. You’ll constantly add sanitizer, waste money, and still struggle to keep your pool sanitized.
High CYA (above 100 ppm): Here’s the catch—too much stabilizer actually locks up your chlorine, making it sluggish and less effective. Algae can bloom even when test readings show adequate chlorine levels.
CYA is raised by adding stabilizer products (often called conditioner) or by using stabilized chlorine tablets (trichlor or dichlor). The tricky part: CYA doesn’t degrade or evaporate. The only way to lower it is dilution—draining a portion of the pool and refilling with fresh water. If your CYA creeps above 70–80 ppm, cut back on stabilized chlorine tablets and consider switching to unstabilized liquid chlorine or calcium hypochlorite for shocking.
Total Dissolved Solids (TDS) and Temperature
Total dissolved solids TDS represents everything dissolved in your water—minerals, salts, chemical byproducts, sweat, sunscreen residue, and more. It accumulates with every chemical addition and evaporation cycle.
For standard chlorine pools, healthy TDS sits around 1,500–2,500 ppm. Salt pools naturally have higher TDS because of the salt itself (2,700–3,400 ppm salt alone).
When non-salt TDS climbs above 2,500–3,500 ppm, water can feel dull, chemicals behave unpredictably, and chronic pool cloudiness becomes difficult to resolve. Statistics show high TDS correlates with persistent cloudiness in 80% of affected pools. The fix is usually a partial drain and refill every few years.
Water temperature also affects chemistry. Warm water above 82°F accelerates chemical reactions and tends toward scaling, while cold water can be more corrosive. Hot tubs and spas running at 100–104°F face amplified versions of every chemistry challenge—which is why spa water requires more frequent testing and adjustment.
Testing Your Pool Water Accurately
Consistent testing is the foundation of proper pool water chemistry. It prevents surprises like waking up Monday morning to green water after a busy weekend, and it catches small problems before they become expensive ones.
Testing frequency guidelines:
| Season | Recommended Frequency |
|---|---|
| Peak summer (June–August) | 2–3 times per week |
| Shoulder seasons (Spring/Fall) | Weekly |
| After storms, parties, or heavy use | Same day |
Proper sampling technique:
Collect water from elbow depth (about 12–18 inches below surface)
Sample away from return jets and skimmers for representative readings
Test immediately—don’t let samples sit
Rinse test containers with pool water before filling
Keep a written log or use a simple phone app to track results. Patterns emerge over time—you’ll learn that your pool’s pH always drifts up after rain, or that busy weekends consume 1.5 ppm of chlorine. This knowledge helps you anticipate problems before they appear.
Test Strips: Fast and Convenient
Test strips are the quickest way to check pH, total alkalinity, and chlorine levels poolside—usually under 60 seconds from dip to reading.
Best uses for test strips:
Frequent checks during hot, busy weeks
Quick readings after storms or heavy pool usage
Daily monitoring when you suspect problems developing
How to use test strips effectively:
Dip the strip for the time specified on the bottle (usually 2–3 seconds)
Hold horizontally and wait the specified time (typically 15–30 seconds)
Compare colors to the chart in good lighting
Record your reading immediately
Keep strips in a cool, dry location with the cap tightly sealed. Replace them yearly—expired reagents give unreliable results. Use strips for day-to-day monitoring, but verify accuracy periodically with liquid test kits.
Liquid Test Kits and Digital Meters
Drop-based liquid test kits using DPD or other reagents provide more precise readings than strips, especially for distinguishing free chlorine from combined chlorine (chloramines).
Invest in a quality kit that tests at least pH, free chlorine, combined chlorine, and total alkalinity. Use it weekly or whenever strip readings seem questionable or water looks “not quite right.”
Important notes about liquid kits:
Reagents have expiration dates (typically 1–2 years)
Store out of direct sunlight and heat
Replace reagents annually for accuracy
Follow instructions exactly—extra drops or wrong timing skews results
Digital photometers and smart meters offer lab-style accuracy and take the guesswork out of color matching. They’re an investment, but worth considering if you struggle with color interpretation or want professional-grade precision. Even digital meters require calibration and proper sampling technique to deliver reliable results.

Balancing Your Pool Water: The Right Order
Here’s a secret that saves time and chemicals: balance your water in the correct sequence. Start with alkalinity, then pH, then calcium hardness, then sanitizer and CYA. Each step creates a stable foundation for the next.
The balancing sequence:
Total Alkalinity — Stabilizes everything else
pH — Now stays put instead of bouncing
Calcium Hardness — Protects surfaces once pH is stable
Sanitizer (Chlorine/Bromine) — Works effectively at proper pH
Cyanuric Acid — Fine-tune after chlorine is dialed in
Essential tips:
Make changes in small increments
Allow the pump to run for several hours between adjustments
Retest before adding more chemicals
Never add acid and chlorine to the same spot at the same time
Keep the circulation system running whenever adding chemicals
Step 1: Adjust Total Alkalinity
Alkalinity comes first because it determines how stable your pH adjustments will be. Without proper alkalinity, you’ll chase pH corrections endlessly.
To raise total alkalinity:
Calculate the amount of sodium bicarbonate needed based on your test results and pool volume
Dissolve the product in a bucket of pool water
Pour slowly around the pool perimeter with the pump running
Wait 6–12 hours before retesting
Repeat if necessary, adjusting in increments
To lower total alkalinity:
Add small doses of muriatic acid (diluted) in front of a return jet
Keep acid away from walls, ladders, and metal fixtures
Allow 24 hours of circulation before retesting
Lower gradually over several days rather than all at once
Keep swimmers out during major acid adjustments until water is fully circulated and pH retested.
Step 2: Fine-Tune pH
Once alkalinity is in range, your pH corrections become much more stable and require fewer chemicals over time.
To raise pH:
Dissolve soda ash in a bucket of pool water
Pour slowly in front of a return jet to distribute
Avoid dumping in one spot (causes temporary clouding)
Retest after 4–6 hours of circulation
To lower pH:
Measure muriatic acid or dry acid carefully
Dilute in a bucket of water (always add acid to water, never water to acid)
Pour slowly in one or more spots with good water movement
Keep away from pool walls and equipment
Adjust in small, repeated steps rather than large single doses. It’s easier to add more chemical than to correct an overcorrection.
Step 3: Set Calcium Hardness
Test calcium hardness after alkalinity and pH are stable, especially at the start of each swimming season or after large water additions from rain or topping off.
To raise calcium hardness:
Calculate the amount of calcium chloride needed
Add calcium chloride slowly to a bucket of water (never reverse this order—generates heat)
Stir until dissolved
Broadcast the solution around the deep end with the pump running
Retest after 24 hours
If calcium hardness is too high:
The only practical fix is to drain a portion of the pool and refill with lower-hardness water. This is especially common in regions with hard well water that can exceed 450 ppm total minerals.
Plan calcium adjustments early in the season (April–June) to protect plaster pools and equipment all summer long.
Step 4: Dial In Sanitizer and CYA
Add chlorine or bromine only after the main balance is achieved. Properly balanced water allows your sanitizer to work effectively and remain stable.
Chlorine considerations:
Add liquid chlorine or granular shock to bring free chlorine to 2–3 ppm
Maintain levels with chlorine tablets in a floater or feeder
Monitor daily during hot weather when chlorine demand is highest
CYA considerations:
Add stabilizer cautiously—it dissolves slowly and accumulates over months
Verify CYA levels monthly during swim season
If CYA exceeds 70–80 ppm, reduce tablet usage and consider partial draining
Major changes to CYA require partial draining, ideally done before peak summer usage when you need maximum chlorine effectiveness.
Sanitizers: Chlorine, Bromine, and Alternatives
Sanitizers are the chemicals that kill bacteria, viruses, and algae, keeping your water safe for swimmers. Chlorine dominates the residential pool market—approximately 90% of backyard pools use it—because it’s effective, affordable, and well-understood.
Typical sanitizer ranges:
| Sanitizer | Ideal Range | Best For |
|---|---|---|
| Free Chlorine | 2.0–3.0 ppm | Standard pools |
| Bromine | 3.0–5.0 ppm | Spas and hot tubs |
Understanding the difference between free chlorine and combined chlorine is essential. Free chlorine is the active chlorine available to sanitize. Combined chlorine (chloramines) forms when chlorine reacts with ammonia from sweat, urine, and organic contaminants. It’s the chloramines—not chlorine itself—that cause that strong “pool smell” and eye and skin irritation.
Total chlorine = free chlorine + combined chlorine. If combined chlorine exceeds 0.2 ppm, it’s time to shock.
Free Chlorine: Your Primary Defense
Free chlorine is the working sanitizer that destroys harmful bacteria, oxidizes body oils, sweat, and organic matter, and keeps your pool safe for swimming.
What consumes free chlorine:
Intense sunlight (without adequate CYA)
Warm water temperatures
Heavy bather load (pool parties, swim teams)
Rain and debris
Organic contaminants
This is why daily or near-daily monitoring matters during hot weather. A pool that tests at 3 ppm Monday morning can drop below 1 ppm by Wednesday afternoon after a heat wave and heavy pool usage.
Common chlorine sources:
| Type | Pros | Cons |
|---|---|---|
| Liquid Chlorine (sodium hypochlorite) | No CYA added, fast-acting | Short shelf life, heavy to handle |
| Trichlor Tablets | Convenient, slow-release | Adds CYA, acidic |
| Dichlor Granules | Fast-dissolving, nearly pH-neutral | Adds CYA, more expensive |
| Calcium Hypochlorite (Cal-Hypo) | No CYA, powerful shock | Adds calcium, requires pre-dissolving |
Chlorine is most effective when pH is in range (7.4–7.6). Maintaining a consistent level beats the rollercoaster of big spikes from infrequent dosing.
Bromine: Best for Hot Tubs and Spas
Bromine offers advantages for hot tubs and spas where high water temperatures would rapidly degrade chlorine. It remains stable at 100–104°F, produces fewer strong odors, and is less affected by pH swings.
Bromine advantages for spa water:
More stable at high temperatures
Effective across a wider pH range (7.2–7.8)
Produces less irritating byproducts
“Spent” bromine can be reactivated with non-chlorine shock
Bromine is typically supplied as tablets in a floating feeder. Check levels several times weekly in heavily used spas—the small water volume means chemistry changes quickly.
Note that bromine is more expensive than chlorine (roughly $0.20–0.40/day versus $0.10–0.20/day per 10,000 gallons) and is UV-sensitive without a CYA equivalent protector. This makes it better suited for indoor spas or covered hot tubs than outdoor pools.
Saltwater Chlorination and Alternative Systems
Here’s a common misconception: saltwater pools are still chlorine pools. The salt chlorine generator uses electrolysis to convert dissolved salt into chlorine on-site, eliminating the need to handle and store chlorine products.
Salt system basics:
Typical salt range: 2,700–3,400 ppm (varies by manufacturer—always check your specific cell manual)
Salt cell generates chlorine continuously while the pump runs
Reduces chemical handling and storage concerns
Cuts chemical costs 50–70% long-term
Initial setup exceeds $1,000 with cell replacement every 3–5 years
Salt cells require regular inspection and descaling to remove calcium buildup. This is especially important in hard-water regions or when operating at higher temperatures. A scaled-over salt cell loses efficiency and fails prematurely.
UV and ozone systems:
These technologies assist sanitization by destroying pathogens as water passes through the treatment chamber. However, they don’t provide a residual sanitizer that stays in the water. You still need adequate free chlorine or bromine levels in the pool itself.
Think of UV and ozone as powerful supplements that reduce chlorine demand and improve water clarity—but not replacements for proper water chemistry.
Shocking and Oxidizing: Deep Cleaning Your Water
Shocking means raising the oxidizer level high enough to break down chloramines, destroy resistant organic contaminants, and restore fresh, clean water. It’s like a deep cleaning for your pool.
When to shock:
Weekly during heavy summer use
After large pool parties or heavy bather load
Following thunderstorms (rain introduces contaminants)
When water develops a strong chlorine odor (chloramines)
At first signs of algae
After a fecal accident
Types of pool shock:
| Type | Active Ingredient | Best Use |
|---|---|---|
| Cal-Hypo Shock | Calcium hypochlorite | Heavy-duty sanitization, algae treatment |
| Dichlor Shock | Stabilized chlorine | Quick dissolving, adds some CYA |
| Non-Chlorine Shock | Potassium monopersulfate | Weekly oxidation without raising chlorine |
Safety rules for shocking:
Shock at dusk or night (sunlight destroys chlorine before it can work)
Run the pump continuously during and after treatment
Keep swimmers out until free chlorine drops below 3–4 ppm
Never mix different chemicals
Add shock to water, never water to shock
When and How to Shock with Chlorine
Chlorine shock is ideal when water is cloudy, has a strong smell, shows early algae signs, or after incidents like fecal contamination or exceptionally heavy use.
How to perform a chlorine shock:
Test current free chlorine and pH levels
Adjust pH to 7.2–7.4 for maximum chlorine effectiveness
Pre-dissolve cal-hypo granules in a bucket of pool water (prevents bleaching surfaces)
Pour the dissolved solution evenly around the pool perimeter
Run the pump continuously for at least 8 hours
Test free chlorine and combined chlorine the next morning
If your pool has high CYA levels (above 50 ppm), you may need higher chlorine concentrations to achieve “breakpoint chlorination”—the level where chloramines are fully destroyed. This can require reaching 10x or more of your combined chlorine reading.
Repeat shock treatment if combined chlorine remains above 0.2 ppm the following day.
Using Non-Chlorine Shock
Non-chlorine shock (potassium monopersulfate) is an oxidizer that destroys chloramines and organic waste without dramatically raising chlorine levels or requiring long wait times before swimming.
Best uses for non-chlorine shock:
Weekly maintenance oxidation in pools and spas
When swimmers want to return within 15–30 minutes
Reactivating bromine in spas
Regular treatment between chlorine shocks
Important: Non-chlorine shock does not sanitize by itself. Your pool still needs adequate free chlorine or bromine residual for pathogen control. Think of non-chlorine shock as keeping water fresh between more aggressive chlorine treatments.
Example routine: Use non-chlorine shock weekly in a hot tub to keep water crystal clear between monthly drains, combined with proper bromine maintenance.
Preventing and Treating Algae
Algae spores constantly enter your pool through wind, rain, debris, and swimmers themselves. The question isn’t whether spores are present—it’s whether your water chemistry gives them room to bloom.
Common algae types:
| Type | Appearance | Difficulty |
|---|---|---|
| Green Algae | Green, cloudy water; slimy walls | Easiest to treat |
| Yellow/Mustard Algae | Yellow-brown patches on walls | Moderate; resistant to normal chlorine |
| Black Algae | Dark spots with roots in surfaces | Hardest; requires aggressive treatment |
The three pillars of algae prevention:
Consistent sanitizer levels: Keep free chlorine at 2–3 ppm minimum
Good circulation and filtration: Run the pump long enough to turn over water daily
Regular brushing and vacuuming: Physical removal prevents colonies from establishing
Algaecides work best as a supplement to proper chemistry, not a replacement for adequate active chlorine. A pool with good chlorine levels rarely needs algaecide; a pool with poor chlorine will grow algae regardless of algaecide additions.
Algae Prevention Routine
Weekly maintenance to inhibit algae growth:
Brush pool walls, steps, and floor at least once weekly
Pay extra attention to shaded areas, behind ladders, and around step corners
Run the pump 8–12 hours daily in hot weather to turn over the entire volume
Keep your pool filter clean—backwash sand/DE filters or clean cartridges regularly
During heat waves or high-risk periods:
Maintain free chlorine at 3 ppm or slightly higher
Test daily when water temperature exceeds 82°F
Consider a weekly preventative dose of non-foaming algaecide
Increase filtration time to 10–12 hours daily
Properly balanced pools can cut algae outbreaks by 90% compared to neglected chemistry. Prevention is always cheaper and easier than treatment.
Treating an Algae Bloom
When prevention fails and you’re facing green water, don’t panic. Follow this systematic approach:
Step-by-step algae treatment:
Test water chemistry — Note pH, alkalinity, free chlorine, and CYA
Correct pH — Lower to 7.2–7.4 for maximum chlorine effectiveness
Brush thoroughly — Break up colonies so chlorine can penetrate
Shock heavily — Use 3–4x normal shock dose for green algae, more for resistant types
Run the pump 24/7 — Continuous circulation until water clears
Clean the pool filter frequently — Backwash or rinse cartridges every 8–12 hours during treatment
Vacuum dead algae — Use waste setting if possible to bypass filter
For stubborn yellow or black algae, expect multiple treatments. Black algae has roots that penetrate porous surfaces and requires repeated heavy brushing, targeted algaecide, and multiple high-dose shocks.
Once water clears, test and restore full balance—especially chlorine and CYA levels—to prevent a quick rebound bloom.
Common Pool Water Problems and Targeted Fixes
Even well-maintained pools occasionally develop issues. Here’s your diagnose-by-symptom guide to the most common problems and their solutions.
Remember: Nearly all visible problems trace back to a handful of underlying causes:
Poor filtration
Low sanitizer levels
Unbalanced pH/alkalinity
High metals or TDS
Persistent or severe issues may warrant a professional water test to identify hidden causes like copper, iron, or excessive TDS that home kits don’t detect.
Cloudy or Dull Water
Cloudy water is probably the most common complaint from pool owners. It makes the pool look uninviting and can signal developing problems.
Common causes of cloudy water:
| Cause | Indicators | Solution |
|---|---|---|
| Low chlorine | Also has chloramine smell | Shock and maintain proper levels |
| High pH | pH reads above 7.8 | Lower with muriatic acid |
| Early algae | Slight green tint, slippery spots | Shock treatment, brush walls |
| Dirty filter | Poor water flow, high pressure | Clean or backwash filter |
| High calcium/TDS | Recent calcium additions, old water | Partial drain and refill |
Treatment approach:
Test and correct sanitizer and pH first
Clean or backwash the filter
Run the pump continuously until water clears
Use a pool clarifier if needed after chemistry is corrected
Be patient—some cloudy conditions take 24–72 hours of continuous filtration to fully resolve.
Stains and Colored Water
Brown, red, green, or black stains often point to metals in your water—typically iron, copper, or manganese from source water or corroding equipment.
Warning signs of metal problems:
Water turns color immediately after shocking
Staining appears after adding fill water (especially from wells)
Green or blue stains around returns (copper)
Brown or rust-colored stains (iron)
Treatment protocol:
Test specifically for metals (home kits exist, but professional testing is more accurate)
Add a metal sequestrant to bind metals into filterable particles
Run the pump continuously to filter out bound metals
Maintain ongoing sequestrant doses to prevent recurrence
Address the source if possible (different fill water, repair corroding equipment)
Severe old stains on concrete or plaster pools may require professional acid washing. Approach this carefully—acid washing removes a thin layer of plaster and shouldn’t be done frequently.
Scale, Scum Lines, and Foam
Scale buildup: Those white, crusty deposits on tile, inside heaters, and coating salt cell plates result from high calcium hardness, elevated pH, and warm water temperatures.
Scale treatment:
Lower pH and alkalinity into ideal ranges
Use scale inhibitors (sequestrants) regularly
Manually remove heavy deposits from accessible surfaces
Descale salt cells according to manufacturer instructions
Scum lines and foam: Oily deposits at the waterline and foamy water typically come from body oils, sunscreen, cosmetics, and detergent residue on swimsuits.
Prevention and treatment:
Maintain proper calcium hardness (low hardness worsens foaming)
Use enzyme products to break down oils
Wipe waterlines weekly with appropriate pool surface cleaner
Clean filters regularly to remove trapped oils
Encourage swimmers to shower before entering
Seasonal Pool Chemistry: Opening, Peak Season, and Closing
Your pool’s chemistry needs shift with the calendar. Spring opening demands different priorities than mid-summer maintenance, which differs again from fall closing. Understanding these seasonal patterns helps you keep your pool water crystal clear year-round.
Climate matters significantly here. Pool owners in colder regions with fully winterized pools face different challenges than those in warm climates who swim year-round.
Spring Opening: From Winter Cover to Swim-Ready
After months under a cover, your pool needs a systematic approach to get swim-ready safely.
Physical first steps:
Remove the winter cover carefully (keep debris out of the pool)
Clean the cover, dry it, and store properly
Remove winterizing plugs and reinstall drain plugs
Fill to normal operating level
Reconnect pump, filter, and other pool equipment
Start the circulation system
Chemistry sequence:
Test full chemistry: pH, total alkalinity, calcium hardness, CYA, free chlorine, and metals if possible
Balance total alkalinity first (target 80–120 ppm)
Adjust pH to 7.4–7.6
Check and adjust calcium hardness for your pool type
Shock the pool to clear winter contaminants
Fine-tune sanitizer and CYA levels
Opening tips:
Cold water responds slowly to chemical additions—be patient
Run the pump 24 hours initially
Plan for 3–5 days of adjustment before swimming
Regularly test throughout the first week
Peak Summer: Weekly Routine During Heavy Use
Summer brings warm water, intense sun, pool parties, and increased chemical demand. A consistent weekly routine keeps everything manageable.
Weekly maintenance checklist:
Skim surface debris daily
Brush walls and floor weekly
Vacuum as needed
Test pH and chlorine 2–3 times per week (daily during heat waves)
Adjust chemicals as needed based on test results
Clean or backwash the pool filter when pressure rises 8–10 PSI above clean
Shock weekly or after heavy use
Managing high-demand periods:
Test chlorine levels daily during holidays, parties, or heat waves
Use solar covers or automatic covers when pool isn’t in use to reduce chlorine loss
Remember that sunscreen, sweat, and body oils dramatically increase chlorine demand
Maintain free chlorine at 3 ppm during heavy-use periods
Fall Closing and Off-Season Care
Properly balanced water at closing time prevents stains, scale, and algae problems from developing over winter.
Closing sequence:
Clean the pool thoroughly—vacuum, brush, skim all debris
Backwash or clean the filter
Balance pH to 7.4–7.6
Balance total alkalinity to 80–120 ppm
Adjust calcium hardness appropriately
Shock the water to 10+ ppm chlorine
Add a quality winter algaecide
Lower water level below skimmers if required in your climate
Blow out plumbing lines and add antifreeze in freezing climates
Install winter cover securely
Winter cover maintenance:
Keep cover clean and free of debris
Remove standing water/snow to prevent cover damage
A tight, debris-free cover limits light and organic matter—both fuel algae growth
Mild climate maintenance:
If you don’t fully winterize, continue periodic testing (at least monthly), especially after heavy rains or long idle periods. Maintain minimum chlorine levels even when not swimming to prevent problems.
Putting It All Together: A Simple Weekly Chemistry Checklist
Mastering pool water chemistry isn’t about memorizing complex formulas or understanding advanced science. It’s about consistent, simple habits that become second nature over a few weeks.
Your repeatable weekly checklist:
[ ] Test water for pH, total alkalinity, and free chlorine (2–3x weekly in summer)
[ ] Adjust total alkalinity if outside 80–120 ppm
[ ] Correct pH if outside 7.4–7.6 range
[ ] Verify free chlorine at 2–3 ppm
[ ] Skim surface debris
[ ] Brush walls and steps
[ ] Vacuum as needed
[ ] Check filter pressure and clean when 8–10 PSI above baseline
[ ] Shock weekly or after heavy use
Monthly additions:
[ ] Test calcium hardness
[ ] Test cyanuric acid levels
[ ] Inspect salt cell (saltwater pools)
[ ] Check equipment for leaks or unusual sounds
Building your personal routine:
Keep notes on what works for your specific pool—surface type, volume, regional climate, and typical bather load all affect chemistry. You’ll learn your pool’s patterns over a season or two. Maybe your pH always rises after weekend thunderstorms. Maybe a single chlorine tablet per week isn’t enough for your 25,000-gallon pool. This knowledge lets you anticipate rather than react.
Once proper pool chemistry becomes a habit, you’ll spend more time actually enjoying your swimming pool and far less time troubleshooting green water, cloudy conditions, and equipment problems. The investment of 15–20 minutes per week in testing and adjusting pays dividends in water clarity, swimmer comfort, equipment longevity, and peace of mind.
Start with the basics this weekend: test your water, follow the balancing sequence, and keep your pool water crystal clear all season long. Your future self—floating peacefully in sparkling blue water—will thank you.